Pringles is giving away free speakers that fit a Pringle can for purchasing 4 cans before 10/31/11. This mod improves the sound by reducing the can’s volume and tilts the speaker to aim at the listener instead of straight up or laying down; great for setting on the bathroom counter while shaving or showering, or for setting on a desk while studying. A video overview is here.
Tools: Table Saw, Ruler, Pen
Materials: Pringles Can, Pringles Can Speaker, Latex Sealant (I used DAP Dynaflex 230 — look for “paintable”, and “water clean-up”), Primer, Paint (I used FlexStone textured paint to hide surface imperfections), sock or washcloth or scrap of fabric.
I gave this a difficulty rating of 2 stars only because of the use of a table saw. It could be cut by hand with a hack saw or utility knife and then sanded to a “flat oval” with a belt sander, or even by rubbing the cut edges on a sheet of sandpaper, but more care must be taken to insure that the angle of both cuts is the same.
Measure and mark 1/2″ from the top and 6–1/2″ from the bottom.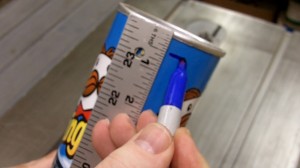
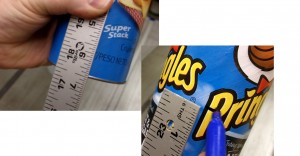
Set the angle to 25 degrees from perpendicular and cut on the marks — keep in mind that the 1/2″ is the shorter edge of the top part and the 6–1/2″ is the taller edge of the bottom.
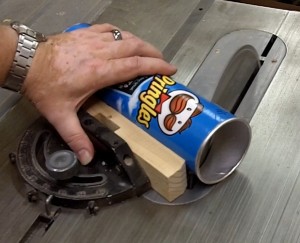 You can change the angle if you like, but keep the angles of both cuts the same so the ovals will line up. Also, if you change the angle, keep each cut significantly under 45 degrees so the speaker’s weight is kept over the base. As the angle approaches 45 degrees the speaker will be hanging over the edge and the can will not stand up by itself without weights or being mounted to a base. I learned this from experience.
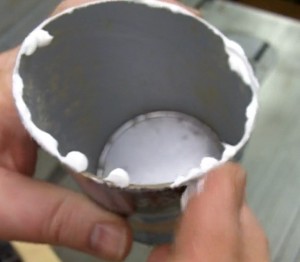 Next, put a bead of sealant around one of the edges and assemble the two pieces. Take care that they are lined up with the shortest part of one against the longest side of the other.
Fill the joint, both inside and outside, with a fillet of sealant and let set, undisturbed overnight.
Once the joint is dry it is ready to use. I painted mine with a coat of primer I had setting around, a coat of flexstone textured paint I had left over from another project, and 2 coats of clear enamel to seal the paint in case it were to get splashed on in the bathroom. I wouldn’t recommend buying flexstone just for this, as it costs like $10 a can, but use whatever you have setting around to make it look better than just a Pringles can. If you use a textured paint, after it drys, sand or scrape it off of the rim to make it easier to snap the speaker off and on to change batteries.
Improving the Sound
Before snapping the speaker in place, “stuff a sock in it”. If you are like me (and I know I am) you have an unmatched sock or one with a hole in it lying around. This will dampen the bass and clean up the sound considerably.
Next, set the EQ on your audio device to reduce both the treble and the bass. This speaker naturally emphasizes the highs, so they need to be rolled off to reduce the harsh, tinnyness. Since you don’t hear any bass from this thing, the natural inclination would be to pump up the bass. But, since this thing can not reproduce any bass, asking it to do so will only make the frequencies it can produce muddy.
Now, to get true stereo sound you will need to get a speaker from a friend and connect them using a “Y” adapter that splits the stereo signal into discrete “left” and “right” channels. I had trouble finding one of these locally, as most “stereo to mono” adapters will combine the left and right channels to give a “mixed” mono signal. Here is the bar code product number of one that I did find at a local, independent, electronics supply house: 0 38975 30403 8. And here is a place on the Internet that sells it: http://www.altex.com/35mm-Stereo-Plug-to-Two-35mm-Mono-Jacks-4025-P141959.aspx. (I have no affiliation with this company, nor have I purchased from them.)
After listening to a pair of these for a couple of weeks, now, with the suggested adjustments and in stereo, I have to admit these speakers do not sound as bad as I feared they would. I use this set up to listen to podcasts while getting ready for work in the mornings, and they are great for “talk” type programs. And when listening to music, they compare favorably to common, low to mid-range ear buds that most people are used to. And, due to the “free” part of the equation, the performance to cost ratio is really quite high.
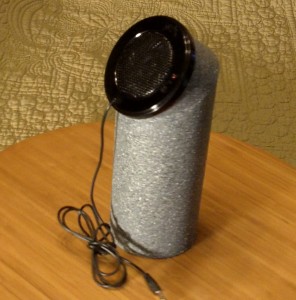
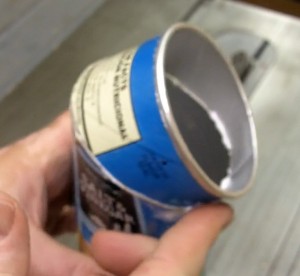

Afterthought: If I were to do it again, I’d try joining the two pieces together with white or carpenters glue, spanning the joint on the inside with paper strips that extend 1/4″ to each side of the joint. I think this would make a stiffer joint that may stand up better to being tugged on when taking the speaker off to change the batteries, since the caulk is rather flexible. Then, after it is set up I’d fill any gaps in the seam with the caulking.
This looks great. I can’t wait for my speaker to come in the mail.
If I had a second speaker I would put one speaker per end of the can and connent both. In the middle I would build a kind of docking station for an IPod.
I wish I couldhave done this .