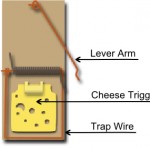
Defining some Terms: Here is an illustration of the anatomy of a mouse trap, just so you know what the terms I use refer to.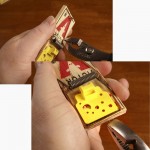
The Staple: The mousetrap I bought had a small staple which held the lever arm (the wire which is loosely attached at one end) from swinging around in the package. If yours has this, use the pliers to pull the staple out and then press it into the end of the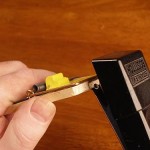 wood mousetrap base, just under the trigger which holds the cheese. Place it so the hole through the staple is going up-and-down. If yours doesn’t come with this staple, use a stapler or staple gun to put a staple in the same place. Make sure the staple doesn’t go in all the way, but allow room for a string to run under it.
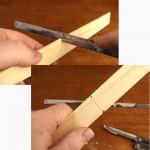 Notches: Use the saw, if you have one, to make slots about 1/16″ to 1/8″ deep, on each edge of the stick at “Line C”. These notches are where one end of the booby trap string will be tied, keeping it from sliding along the stick. I just used a hacksaw blade. If you don’t have a saw or saw blade, you could use a knife to whittle small notches.
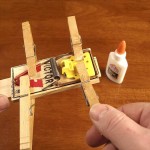 Glue: Glue the mousetrap to the stick, with the “cheese trigger” end near “Line A” and the opposite end near “Line B”. Use the clothespins or small clamps, if you have them, to clamp the pieces until they dry. If you don’t have clamps, use some books to hold the pieces tight while drying.
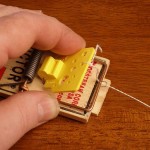 Attach the string: A 3′ length of string should generally be all that is needed, but keep in mind that it is easy to replace it with a longer one if you have an idea that requires it, or cut it shorter if helpful. I prefer black upholstery thread. It is strong and the black color makes is harder to see. Sewing thread is as strong as is needed to set off the trap, and it is also harder to see than, say, kite string. Thread the string up through the staple, feed it under the spring-loaded trap wire, then tie it to the “cheese trigger”. The mousetrap I have has a plastic “cheese trigger” made to look like swiss cheese, so I tied the string to the hole closest to the end of the trigger. The purpose of the staple is to convert a pull of the string from any direction into a downward pull to set off the trap.

It would be fun to see videos of people getting “caught” with one of these. Post them to YouTube, and share the address here.
My brother used to nail me with these things all the time. We had a trap war for the better part of a year. I ought to build one just for old-timey sake!